Showing posts with label RECIPES. Show all posts

Jul 1, 2014

HOT SUMMER DAYS = POPSICLES!

SMASHED BERRY, LIME, AND COCONUT YOGURT
POPSICLES

8-12 oz. mixed berries
Juice of 1 lime, freshly squeezed
3 1/2 Tbsp. sugar or stevia
16 oz. Greek yogurt
1/2 cup + 2 Tbsp. rich coconut milk
One or two big pinches of salt


These are the popsicle forms I purchased
off amazon.com.  They look real professional
when I pop them out of the molds, and make
10 popsicles.  Use whatever you have though.


To start with, I gather all my ingredients
and put the berries into a pie plate.  This
makes it easier to mash them.  Here, I've
used our own strawberries, and last year's 
frozen Chester blackberries and blueberries.
Use whatever soft fruits you have on hand!
I'm letting them sit awhile, since part of them
are frozen.


I use a large serving fork to mash the berries.
A potato masher does a great job too.  Go easy,
as the juices can end up all over you, instead of
staying in the dish.


Next, I squeeze the juice from a nice ripe lime
all over the berries.  I then add 1 Tbsp. sugar, stir it
all together, and let sit for 10-15 minutes so
they can get to know each other.  At this point,
I start to salivate in anticipation.


In a separate bowl, mix together the Greek yogurt,
rich coconut milk, 2 1/2 Tbsp. sugar, and salt.
I use my hand blender due to how the coconut
milk stays hard if not warm and melted (you know
how it can be), and it all becomes so creamy.
Stick your finger in, lick to make sure you are
happy with the mixture.  Note:  Sometimes it
takes a number of licks to be sure.


Gently fold in the berries--juice and all--
leaving streaks in the mixture. 


Using a half cup measuring cup and a funnel,
I pour the mixture into each mold.  I top them
up just a little…


…but I've found the secret to be not to fill them
to the very top as it makes it very difficult to
extricate them later.


Put the lid on and pop them into the freezer
for one hour.


At this point, I can push the sticks in half way
without them floating to the bottom.  Back into
the freezer for at least 4 hours, or overnight; 
wait for a hot afternoon...


…and then enjoy them on the patio 
with someone you love.  Makes you feel like
a kid again!


This recipe definitely a keeper.
Like you!


May 8, 2014

TRIM HEALTHY MAMA MOONSHINE

No, I have not gone "off my rocker"!  I have found a drink recipe that is too good to keep to myself.  My friend Rebekah told me about it, and then I found not only the recipe for it on the internet, but a great blog by a lovely Christian mother of seven to boot.  You can find  Sheri Coers' blog at www.thecoersfamily.com for lots of excellent information on THM and more.  As I thought about this recipe which is not included in the THM book, but is posted online by the authors, I realized the only thing that linked it to "moonshine" is the process of sipping it out of a quart  mason jar!

Yesterday I jumped in and made up a batch, and carried it with me all day around the house and out to the garden while we dug yet more holes.  I read that this drink has some big-time health benefits from two of the ingredients, Ginger and Apple Cider Vinegar.  Here is what I read on Sheri's blog:

      Ginger is a natural anti-inflammatory treatment. It 
       can help lower blood pressure, ease menstrual

      pain, help treat migraines, and even battle cancer
      cells in the body.

      Apple Cider Vinegar is made from fermented apples,
      and Braggs is unpastuerized and has "the mother" *
      in it, making it high in enzymes and minerals.  

Okay, enough intro, here's the recipe.  Give it a try, and see if you find it as yummy and satisfying as I have.


THM GINGER LIME 
GOOD GIRL MOONSHINE


Ingredients:

2 Tablespoons Bragg Apple Cider Vinegar
1 Tablespoon grated fresh ginger
1 Tablespoon lime juice
2 Stevia sweetener packets
Ice
Water
1 quart-sized mason jar

Instructions:

1.  In a quart-sized mason jar grate about one tablespoon of fresh ginger.  No need to peel it, but do freeze it which makes it easier to grate.  You can grate it right into the jar when you learn what one tablespoon looks like.

2.  Next, add a tablespoon of lime juice, either fresh squeezed, or ready-squeezed from the market.

3.  Add two Stevia sweetener packets.

4.  Then add two tablespoons of Bragg Apple Cider Vinegar.  Be sure to shake the bottle first, to get all the good stuff that tends to settle at the bottom.

5.   Fill your mason jar with ice--about halfway.

6.   Fill the jar with water (filtered if possible), screw on the lid, and shake to mix.  I continue to shake it each time I take a drink as this remixes the ginger which tends to settle to the bottom.

Could this be any easier?  It tastes like lemonaide, and also puts me in mind of kombucha drinks, which are also very healthy and downright delicious.

Ready?
Set?
SIP!

* PLEASE don't ask me what "the mother" is…perhaps one of you knows and will enlighten me.
      

May 3, 2014

LEMON-BLUEBERRY YOGURT LOAF


Living in the land of the PNW brings such bounty with it that we often have plenty to pop into our freezer as the growing season rolls along.  I try to remember to keep a good supply of blueberries tucked away for the winter through spring months, and find them handy to throw into pancakes, muffins, and a luscious tea bread like this one.  Doesn't just the name make your mouth water?  I want to bake this up, turn on the kettle, and settle in for a delicious cup of tea, for the scrumptiousness found in this delightful combination of blueberries and lemon. Won't you join me?

LEMON-BLUEBERRY YOGURT LOAF

For the loaf:

1 1/2 cups + 1 Tbsp. UNBLEACHED FLOUR, divided
2 tsp. BAKING POWDER
1/2 tsp. KOSHER SALT
1 cup PLAIN WHOLE-MILK YOGURT
1 cup SUGAR
3 large EGGS
1 Tbsp. grated LEMON ZEST
1/2 tsp. PURE VANILLA EXTRACT
1/2 cup VEGETABLE OIL
1 1/2 cups BLUEBERRIES, fresh or frozen, 
thawed and rinsed
(actually, I just throw mine in frozen)

For the Lemon Syrup:

1/3 cup freshly squeezed lemon juice
1/3 cup sugar

For the Lemon Glaze:

1 cup CONFECTIONERS' SUGAR, sifted*
2 to 3 Tbsp. fresh LEMON JUICE

DIRECTIONS:

Preheat the oven to 350 degrees F.  Grease bottom and sides of one 9x5-inch loaf pan; dust with a little flour, tapping out excess.

In a medium bowl, sift together flour, baking powder and salt; set aside.

In a large bowl, whisk together the yogurt, sugar, eggs, lemon zest, vanilla and oil.  Slowly whisk the dry ingredients into the wet ingredients.  In a separate bowl, mix the blueberries with the remaining tablespoon of flour, and fold them very gently into the batter.

Pour the batter into the prepared pan and bake 50 to 55 minutes, or until a toothpick or wooden skewer inserted in the center of the loaf comes out clean.  Let cool in the pans for 10 minutes before removing loaf to a wire rack on top of a baking sheet, or waxed paper.

While the loaf is cooling, make the lemon syrup in a small saucepan over medium heat.  Stir together the lemon juice and sugar until the sugar is completely dissolved. Once dissolved, continue to cook for 3 more minutes. Remove from the heat and set aside.

Use a skewer to poke holes in the tops and sides of the warm loaf.  Brush the top and sides of the loaf with the lemon syrup.  Let the syrup soak into the cake and brush again.  Let the loaf cool completely.

To make the lemon glaze, in a small bowl, whisk together the confectioners' sugar and 2-3 tablespoons of the lemon juice.  The mixture should be thick but pourable.  Add up to another tablespoon of lemon juice if the mixture is too stiff.  Pour the lemon glaze over the top of each loaf and let it drip down the sides (this is why you place a baking sheet, or waxed paper, under the wire cooling rack).  Let the lemon glaze harden, about 15 minutes before serving.

*When sifting flour or confectioners' sugar, I just use an appropriately-sized whisk, and it ends up the same as passing it through a sifter.

NOTES:

For this recipe, you can also use half blueberries and half raspberries, or any other type of berry you have on hand!

This recipe will also yield about 12 standard muffins or 36 miniature muffins, baking time adjusted.

It could be doubled and baked in a well-greased and floured bundt pan, baking time adjusted.

This recipe could also be baked in an 8-inch square or 9-inch round, to create a thin cake (1 1/2 inches tall), baking time adjusted.

Put the kettle on and enjoy a
delicious, moist slice!


This recipe is another keeper,
like you!

Many thanks to Sweet Pea's Kitchen
for the recipe, and photos.


Apr 8, 2014

EASTER POTATO PIE


POTATO PIE


One of my favorite recipe memories is the Potato Pie made by my Mother for each Easter meal.  Her crusts were sublime, perfectly flaky, holding within them finely sliced potatoes, onions and parsley, moistened with  full-on heavy cream.  This made a perfect paring with a fine ham, and was really best eaten the day after making, which fits into a busy lifestyle.  This potato pie recipe came from the French side of the family, stamped with the earmarks of a simple, delicious, yet elegant, dish. 

PASTRY

I would recommend you use two of the crusts from my previous Julia Child pie crust recipe, OR your favorite two-crust recipe.  Chill before rolling out.

FILLING

7 cups pared POTATOES (6 medium), thinly sliced, using a mandolin or food processor, or if you like to cut and chop like me, a nice sharp knife
2 tsp SALT
1/8 tsp PEPPER (black or white, I prefer the white for this dish)
1 large ONION, thinly sliced
1 Tbsp snipped fresh PARSLEY
2 Tbsp BUTTER
EGG YOLK and 1 Tbsp WATER, mixed, for brushing top crust
1 cup HEAVY CREAM

HEAT OVEN to 375 degrees F.

1.  Toss sliced potatoes with the salt, pepper, onion, and parsley.  Hold in bowl until ready to pour into pie crust.
2.   Roll out one chilled pastry crust so that it is 1 1/2" larger and same shape as a shallow baking dish or 9" pie plate. Fit pastry gently into dish, fill with potato mixture and dot with the butter, sliced into 4 pieces; then trim pastry to edge of dish/pie plate.
3.  Roll out second chilled pastry crust large enough to lay over potato mixture and a little larger.  You can either fold the top crust into the bottom and make a nice edge, OR you can cut it to the size of the dish, using the left-over dough from the two crusts for a rope or fluted edge.  Cut several short slits in the middle of top crust to let the steam out--you will spoon or baste the cream into the potato mixture later.  Brush crust with the egg yolk/water mixture.
4.   Bake pie on rack middle of oven for 1 to 1 1/4 hour, until potatoes are tender (insert knife into slits to test).
5.   Remove pie from oven and gently enlarge slits a little, pour in cream either with a spoon or use a baster (which works well).  Let stand a few minutes, then serve, or serve the pie the next day (giving time for the flavors to 'marry').

Makes 8 servings, more or less, depending on how you slice the pie.


This is definitely a keeper,
like you, my friend!

Mar 2, 2014

POTATO-LEEK SOUP


Now THIS is the soup supreme to warm your tummies during our blustery, rainy winter days.  My suggestion would be to try and get your produce as fresh as you possibly can, the difference will thrill you!  Also, make it to the consistency that appeals to you using either more or less liquid.

INGREDIENTS

6-8 medium POTATOES, Yukon or
German Butterball the best
3 cups cleaned, thinly sliced LEEKS,
including tender part of greens (look
for soil between the greens, wash out)
3-4 large CARROTS, chopped or sliced
3-4 ribs CELERY, chopped or sliced
6-8 Tbsp. real BUTTER
1 tsp. SALT, or to taste
1-2 cups CHICKEN STOCK, VEGETABLE STOCK
 or WATER (homemade stock wows it)
3 cups whole MILK, or to 
consistency you prefer (the potatoes
tend to "drink" up the liquid a bit--you 
can always add more, subtracting it is
difficult)
1-2 tsp. HERBES DE PROVENCE, or
to taste (or snippets of herbs you love)
Instead of black pepper, I use 
WHITE PEPPER (white for a cream soup)
Start with 1/8-1/4 tsp. of the pepper
I will tell you the SECRET INGREDIENT
at the end, which drives this soup
"over the top"

PREPARATION

1.  Scrub the potatoes, and cut them into small chunks like this.


2.  Place them in a dutch oven or stock pot with the leeks, celery, carrot and butter.  Add salt.  Cook the vegetables, stirring over medium heat until the butter is melted and everything is coated (about 5 minutes).  It will look like this. The smell will hurry you along!


3.  Add the stock or water, bring to a gentle boil, cover and reduce heat to a simmer.  Cook until the potatoes are very soft (20-30 minutes).  Check the moisture level while simmering--you may need to add a little more stock or water if it gets too low.

4.  When the potatoes are tender, remove the pan from the heat and puree the contents with the milk added (if you have a wand that purees, this is the best as you do not have to remove the contents from the pan--if you don't, use a blender or a food processor fitted with the steel blade).  Make sure the mixture is utterly smooth.  Return it to the pan if need be.

5.  At this stage, add Herbes de Provence, or fresh or dried herbs of your choice (such as parsley, thyme, marjoram, etc).  Add the white pepper if you have it on hand, if not, the black.  Taste to see if it needs more salt.

6.  Now this is my secret ingredient that I came upon years ago by accident:  I finely grate the zest of an organic lemon into the soup!  It might be good for you to start with HALF the zest, taste and see if you should go further.  This truly adds an extra ZING to this old favorite.

7.  Heat the soup gently, stirring, until just hot--do NOT let it boil or you will burn your soup!  Serve it right away with fresh chives, parsley, or herb of your choice finely minced on the top, along with hot crusty bread.  Bon appetite my friends!

pinodra


themurmuringcottage

This is definitely a keeper!

Note of thanks:  I have used this recipe,
originally from The Enchanted Broccoli Forest by
Mollie Katzen, for years, altering it to my personal tastes.  Thank you, Mollie!

Feb 17, 2014

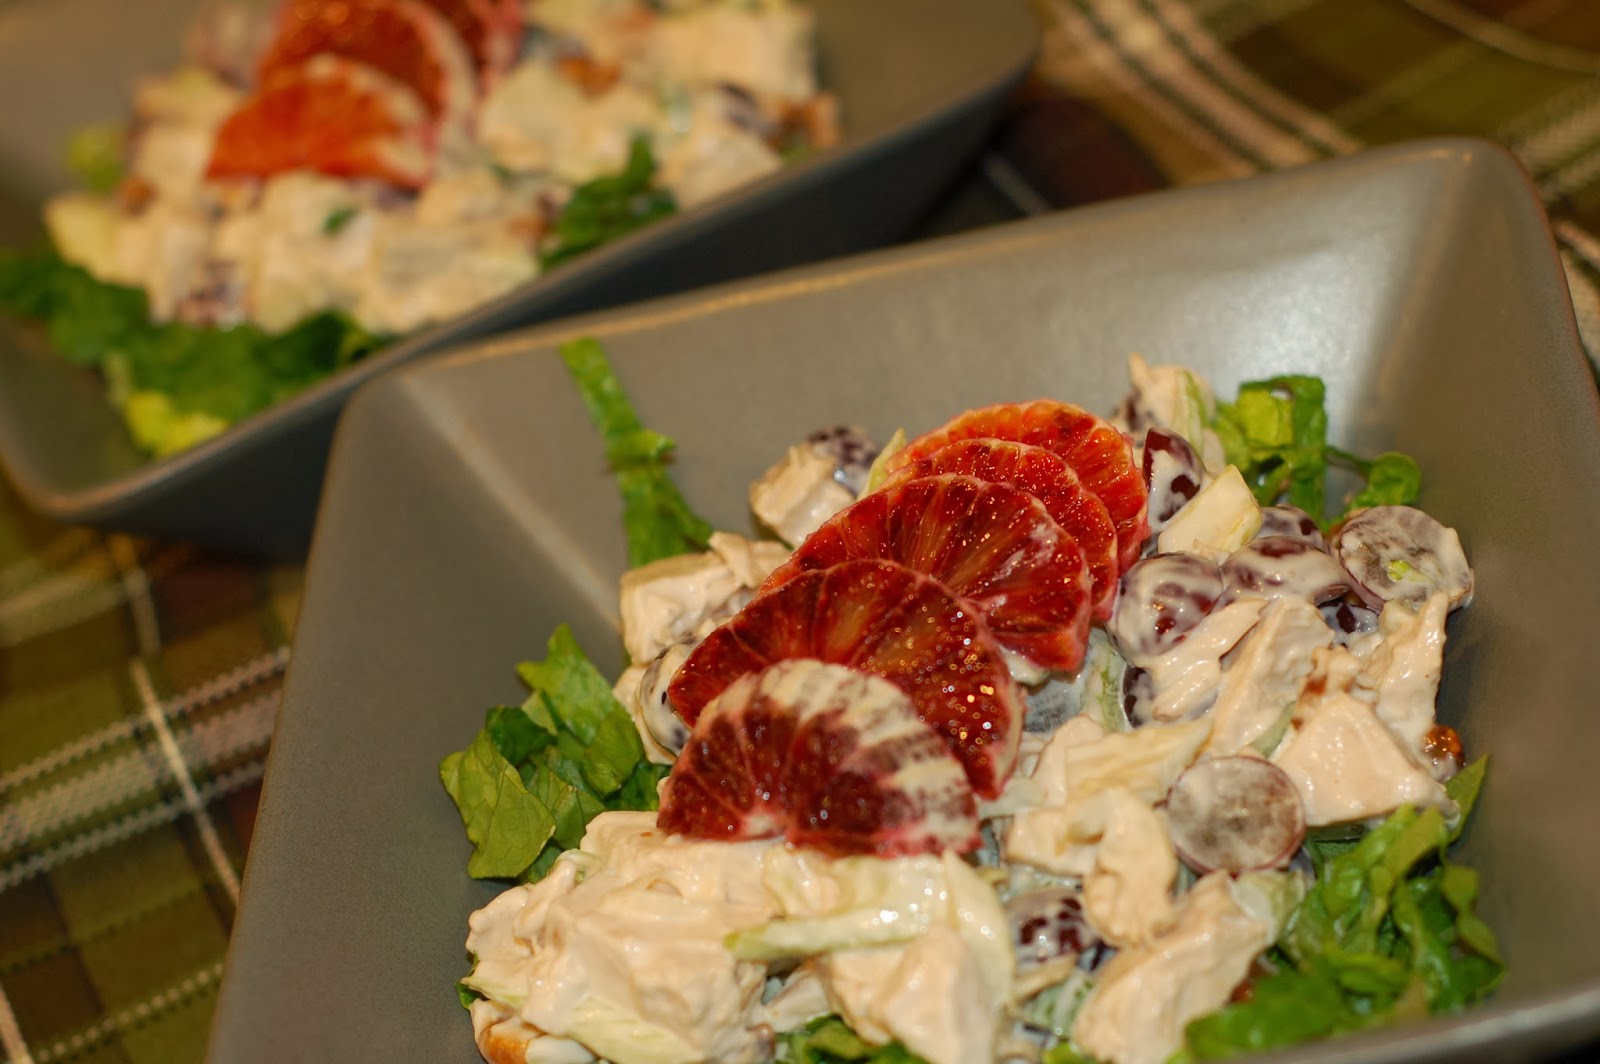
FRUITY NUTTY CHICKEN SALAD (NON-FASTING)


This is a very quick recipe to throw together, with results that taste like you've spent a good deal of time in the kitchen.  I made it last week, and my dear husband found it to be both filling and delicious, something I'm not always able to achieve when I'm attempting to use what is at hand and I'm "on the fly".  Perhaps one day it just might "save your bacon" too.

Salad ingredients:
2 pre-cooked boneless, skinless chicken
breasts, cut into 1" pieces
OR
The white breast meat from a large,
pre-cooked chicken, cut into 1" pieces
3-4 scallion onions, chopped fine,
including tenderest part of the greens
Walnuts (glazed or otherwise), chopped
OR your favorite nuts, chopped
2 large celery ribs, sliced on the diagonal
1 to 1/2 cups red or green grapes,
sliced in half (red is prettier)

For the dressing:
1 to 1/2 cups Mayonnaise
(depending on how much meat you have)
1 Tbsp. lemon juice
Sweetener of your choice:
Stevia, honey, or ? to taste
Whip together, fold gently into above
ingredients in a large bowl

Presentation:
I finely cut Romaine lettuce and place it into
the bottom of a large, shallow salad bowl,
or on a pretty plate.
Spoon equal portions of chicken 
mixture onto top of greens.
Top this with parts of a nice, sliced orange.
The one pictured is a blood orange, in season
right now--BTW, they have a very short season
if you like them--lovely contrast, tasty too.


Enjoy!


Another keeper.


Jan 25, 2014

CHICKEN POT PIE FOR A WINTRY DAY


This is a real quick, easy-peasy recipe for you busy women. Remember the Julia Child Pie Dough recipe posted January 13th?  This is where it shines, because all you do is prepare the pie filling, roll out the thawed dough, slap it over the filling and pop it into the oven!  Your own chicken pot pie will be real comfort food, especially on these chilly winter days.

I made this recipe up out of desperation awhile back, loved it and try to make it often.  You do NOT have to purchase the items from Trader Joe's, the broasted chicken from Costco, or have a pre-made pie crust in the freezer as I did; but feel free to duplicate from elsewhere, remembering the point here is to make something that tastes like you've slaved for hours in short order!

1 large ONION (bigger the better)
1 BROASTED CHICKEN from Costco
2-16 oz. bags frozen Trader Joe's VEGETABLE MELANGE
2-16.9 oz. jars Trader Joe's ALFREDO SAUCE
1 or 2 4-oz. cans SLICED MUSHROOMS
1 pre-made, frozen Julia Child Pie Crust, thawed

Remove pie crust from freezer and place in the refrigerator to thaw THE DAY BEFORE.

Pre-heat oven to 375 degrees.

Remove all meat from your broasted chicken, cut up into chunks the size you like, and have ready in a bowl.

Chop large onion, fry in a big fry pan or dutch oven in 2-4 Tbsp. real butter ("One can never have enough butter"~Julia Child) over medium heat until translucent.

Cut open two bags TJ's Vegetable Melange (which contains more butter!), pour into pan mixing with onions, stirring until just thawed (not over-cooked) and vegetables are a bright color.

Pour in the two bottles TJ's Alfredo Sauce (getting every last bit out with a spoon), stir until all is coated and warmed nicely.

Add one or two 4-oz. cans sliced mushrooms, incorporate.  You can add fresh, sliced and fried gently in butter mushrooms if you like, but this takes away from the easy and fast aspect.

Stir in chicken chunks and bring it all to a warm stage, but not so it bubbles.  I guess I have a horror of overcooking things!

Have a clean casserole dish ready that will hold the pie filling comfortably, to within 1"-2" from the top.  Pour it in, level off.

Roll out pie dough on floured surface so that it is 1"-2" wider than the casserole, lay over top, crimp edges, cut several steam holes in middle (see photo), and place in a pre-heated 375-degree oven for 20-30 minutes until the crust is golden brown (keep a watch).  Since ovens vary so greatly, I do underline that you check toward the end of the baking time.  I also think it wise to place casserole on a middle rack and place on a lower rack a cookie sheet just in case your pot pie oozes a bit.

ezrapoundcake

To serve:  Because there is no bottom crust, I often serve my pot pies in a bowl.  Dip into the steaming yumminess, close your eyes,  and enjoy!


This is definitely a keeper.
Like you.


Jan 13, 2014

A SPECIAL JULIA CHILD RECIPE


Okay, dear friends, this is a very special recipe, tried and true and one you will want to try.  I show the photo of the Kitchen Aid because Julia recommends this appliance when making this marvelous pie dough.  If you have another appliance like it, equipped with a paddle, that would work too.  This recipe makes four (4) pie crusts which I freeze in separate packages, and then pull out one or two depending on what type of pie I am making, so handy and a real time-saver!  This recipe will not disappoint.

JULIA CHILD'S FLAKY PIE DOUGH

5 1/4 cups PASTRY or ALL-PURPOSE FLOUR
1 Tbsp. KOSHER SALT
1 1/2 sticks cold UNSALTED BUTTER,
cut into small pieces
1 3/4 cup (11 oz.) solid VEGETABLE SHORTENING,
chilled
1 cup ICE WATER

In Kitchen Aid with paddle:
Put flour and salt into the bowl and stir to mix.  Add the butter and mix on low until mixture looks coarse and crumbly.  Add shortening in small bits, continue on low.  When clumpy and curdy looking, and when small amount holds together when pressed between fingers, add the ice water and mix only until incorporated.

Finishing the product:
Turn dough out onto work surface and fold over on itself two or three times, just to finish the mixing and gather it together.  My Mother always told me, the less you handle pie crust dough the flakier it will be, and nobody but nobody made pie crust better than she did.  I even think Julia would be jealous.  Okay, I then divide the dough into four equal parts (I even go so far as to weigh them on my little kitchen scale), wrap and label these babies and pop them into the freezer.  When I want a crust (or crusts) for a recipe, I just let them thaw in the refrigerator until still cold, roll them out and prepare myself for a real taste treat.  And did I forget to say, it's super easy, no fear!


A keeper!